Using the Material Tool
Change materials on specific surfaces without modifying the rest of the design.
What is the Material Tool?
The Material tool allows you to change the material of specific components within an image without modifying the rest of the design. Instead of regenerating the entire image, you can select a precise area of the render and apply a new material to that region while keeping the surrounding architecture unchanged. This is useful when you want to experiment with different façade materials, surface finishes, or textures while preserving the original composition.
Understanding the interface
Material Panel Overview
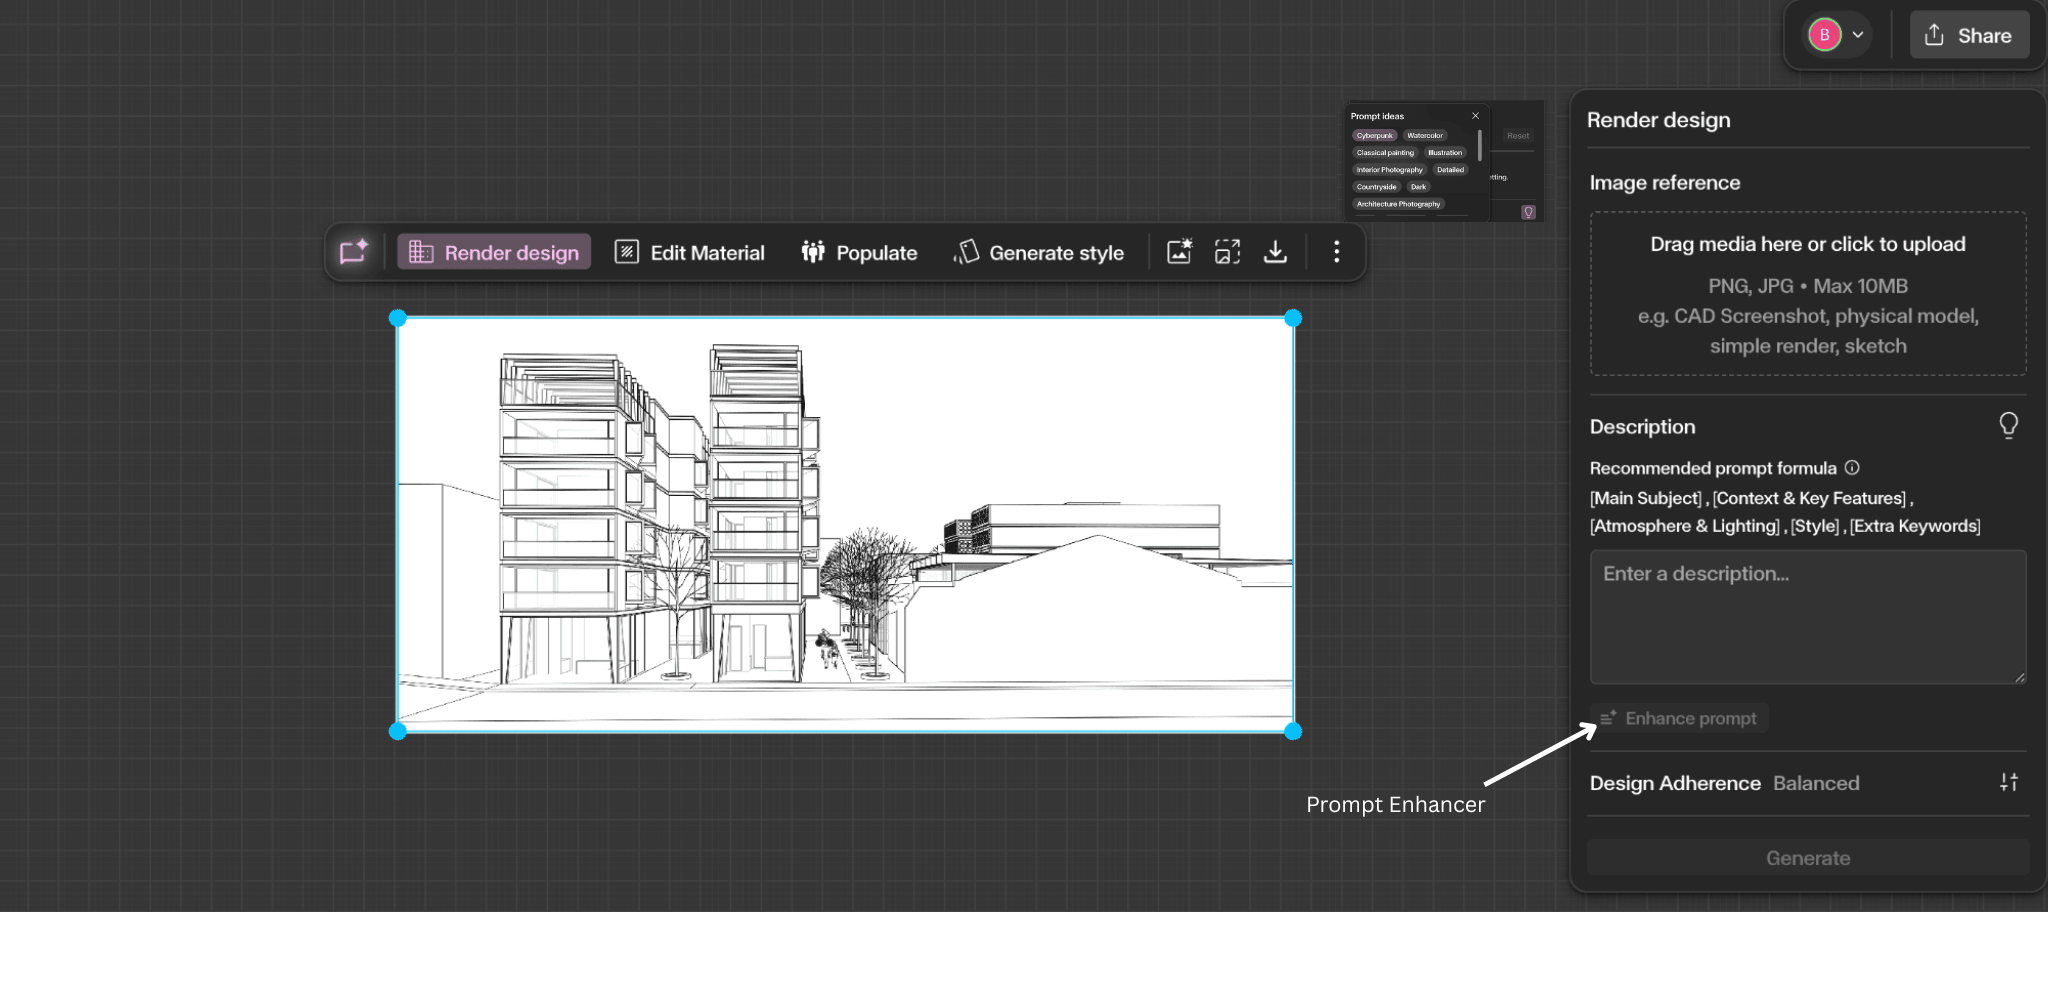
When you select an image and activate the Material tool, the contextual toolbar activates the material panel as well as tools relevant to the material workflow on the canvas.
- Material reference – upload or select a texture image
- Description – describe the material you want to apply
- Enhance prompt – auto-improves your description
- Generate – apply material to the selected area
On the Canvas
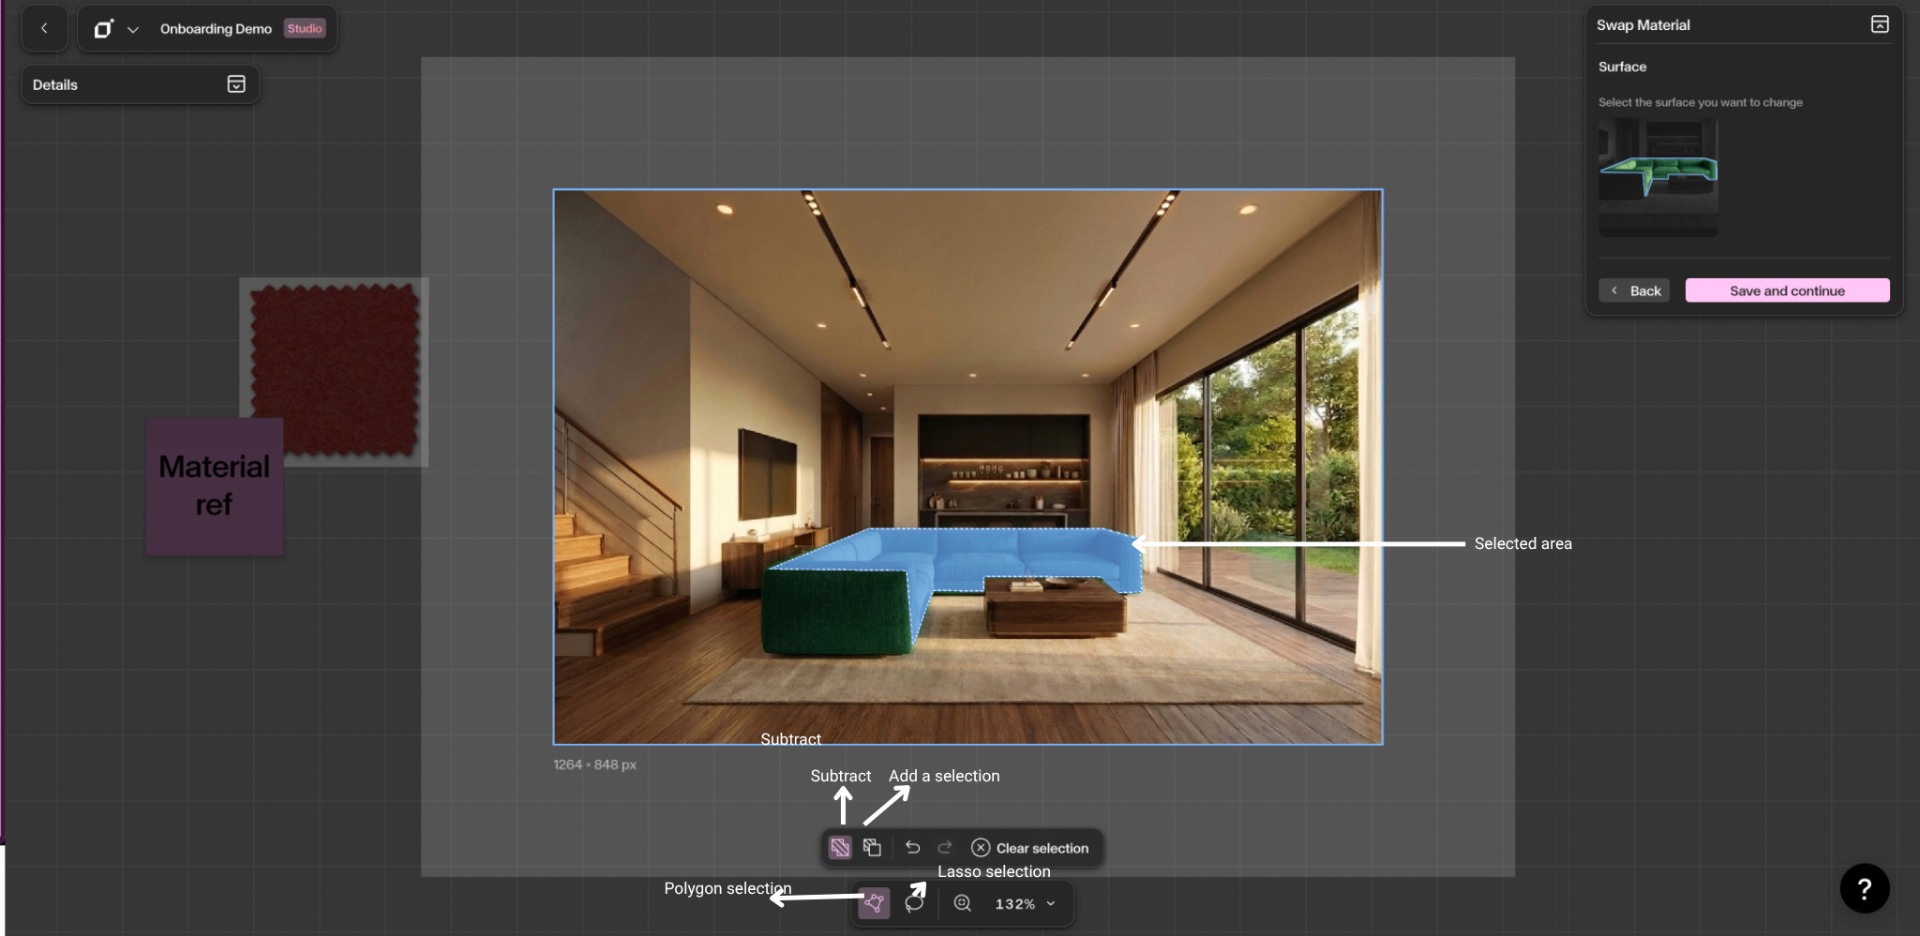
- Selection tools – select area using polygon or lasso
- Selected area – highlighted region where material is applied
- Undo – remove or adjust selection
Step by Step
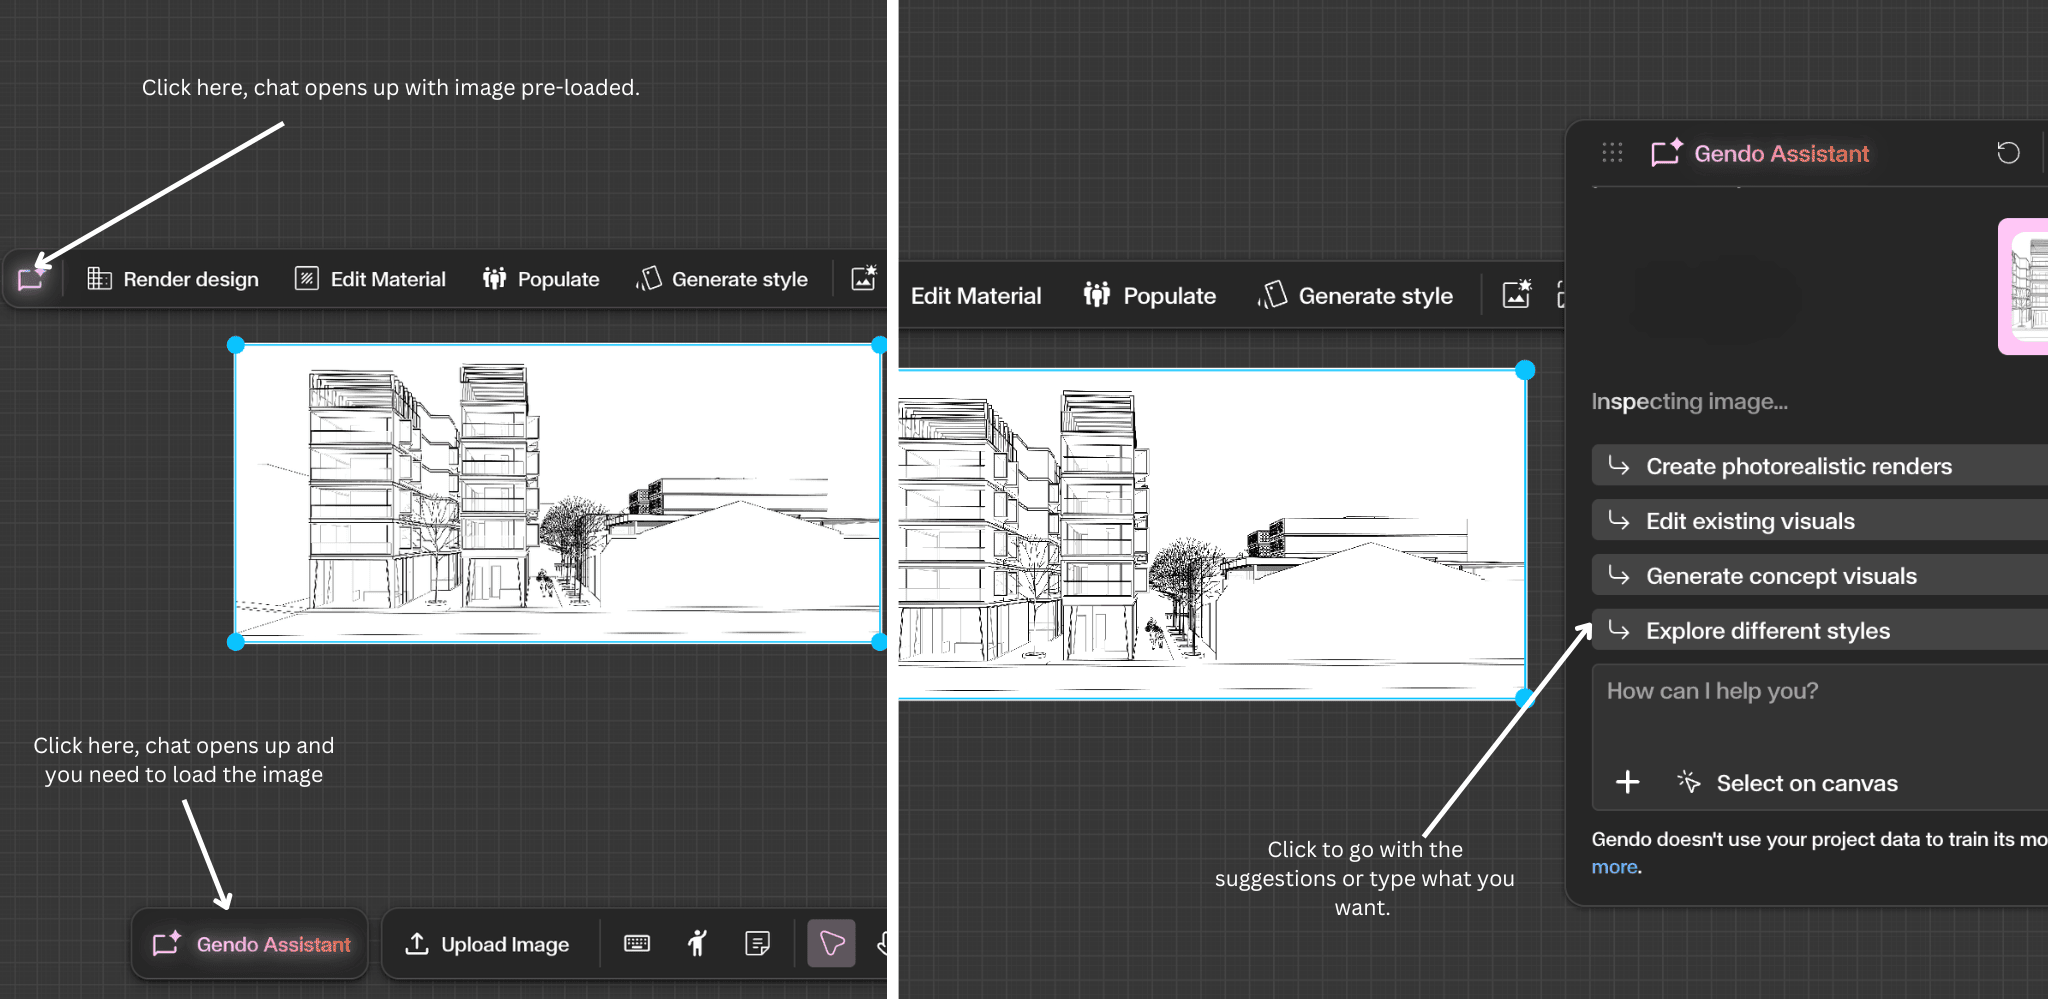
Select the image, choose Swap Material, then Select an area
Select any rendered image on the canvas to begin — you can also upload an image from elsewhere. When the image is selected, the contextual toolbar appears. Choose Swap Material from the toolbar to open the panel, then click Select an area to start defining the surface you want to change.
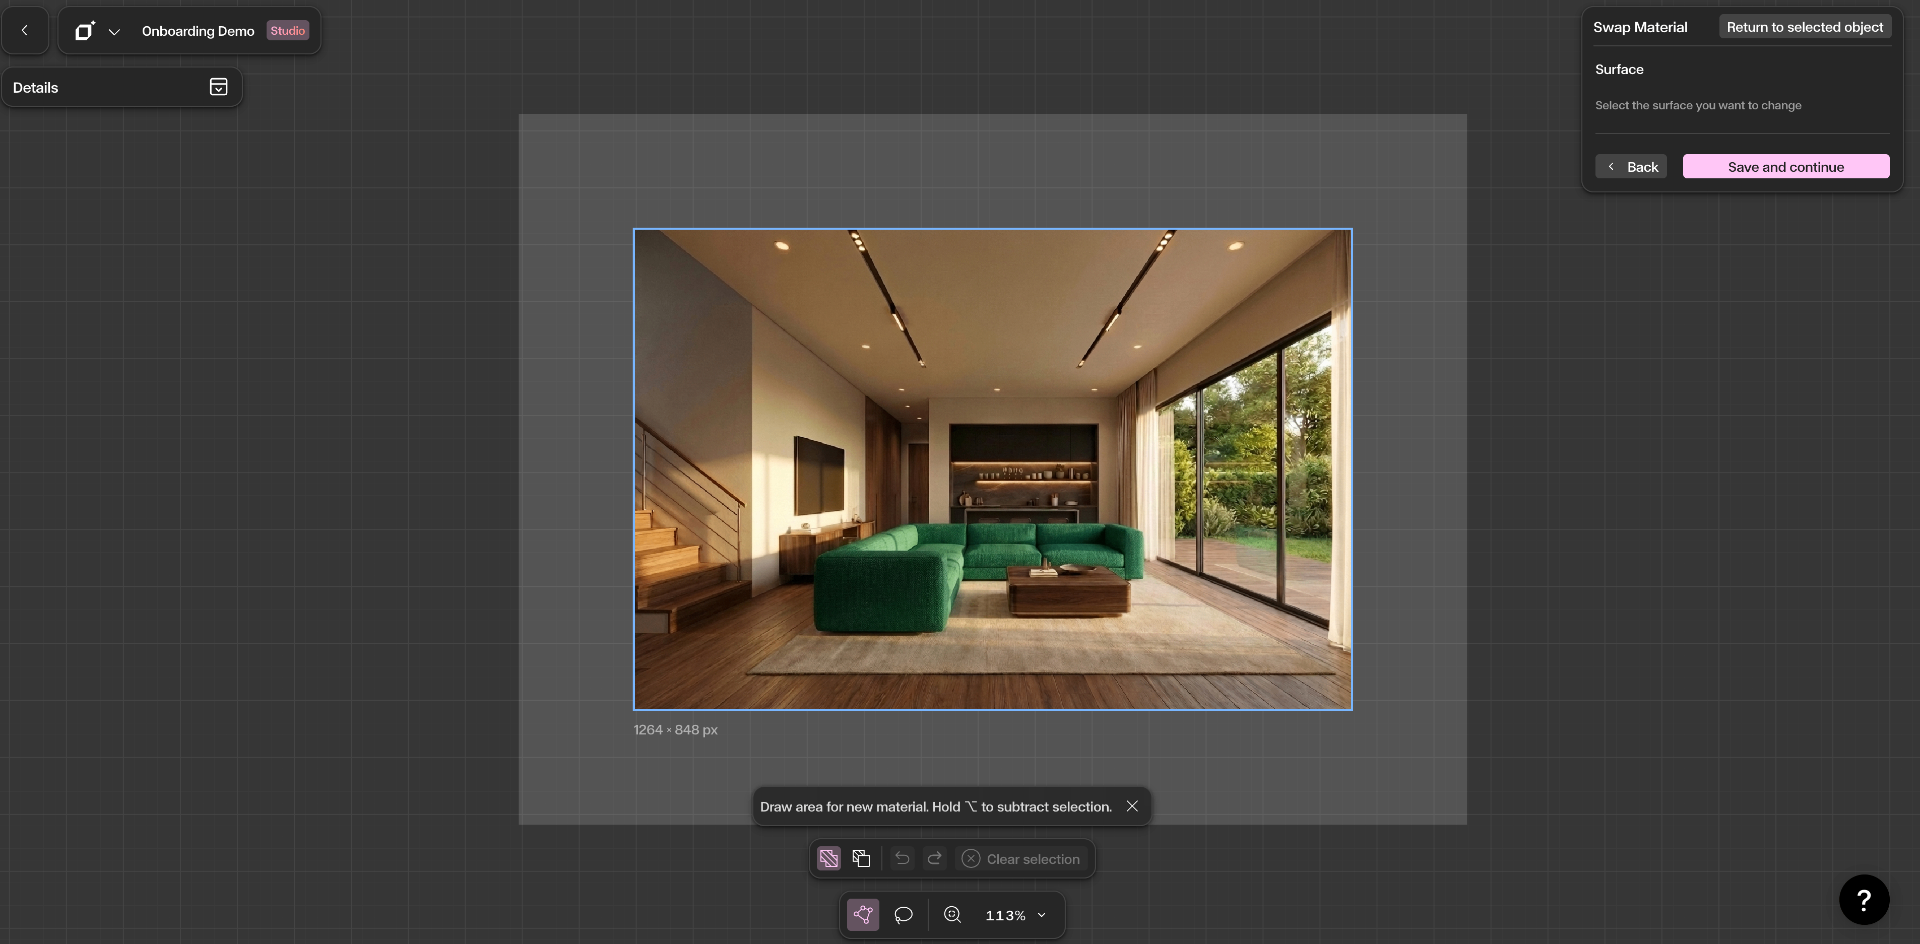
Draw the surface you want to change
Use the Polygon tool for architectural elements with clean, straight edges (façade panels, windows, walls) or the Lasso tool for irregular or organic shapes. Click to add points around the surface — hold ⌥ (Alt) to subtract from the selection and refine the mask. Use Clear selection to start over, or zoom in to capture finer details. When the mask looks right, click Save and continue in the Swap Material panel.
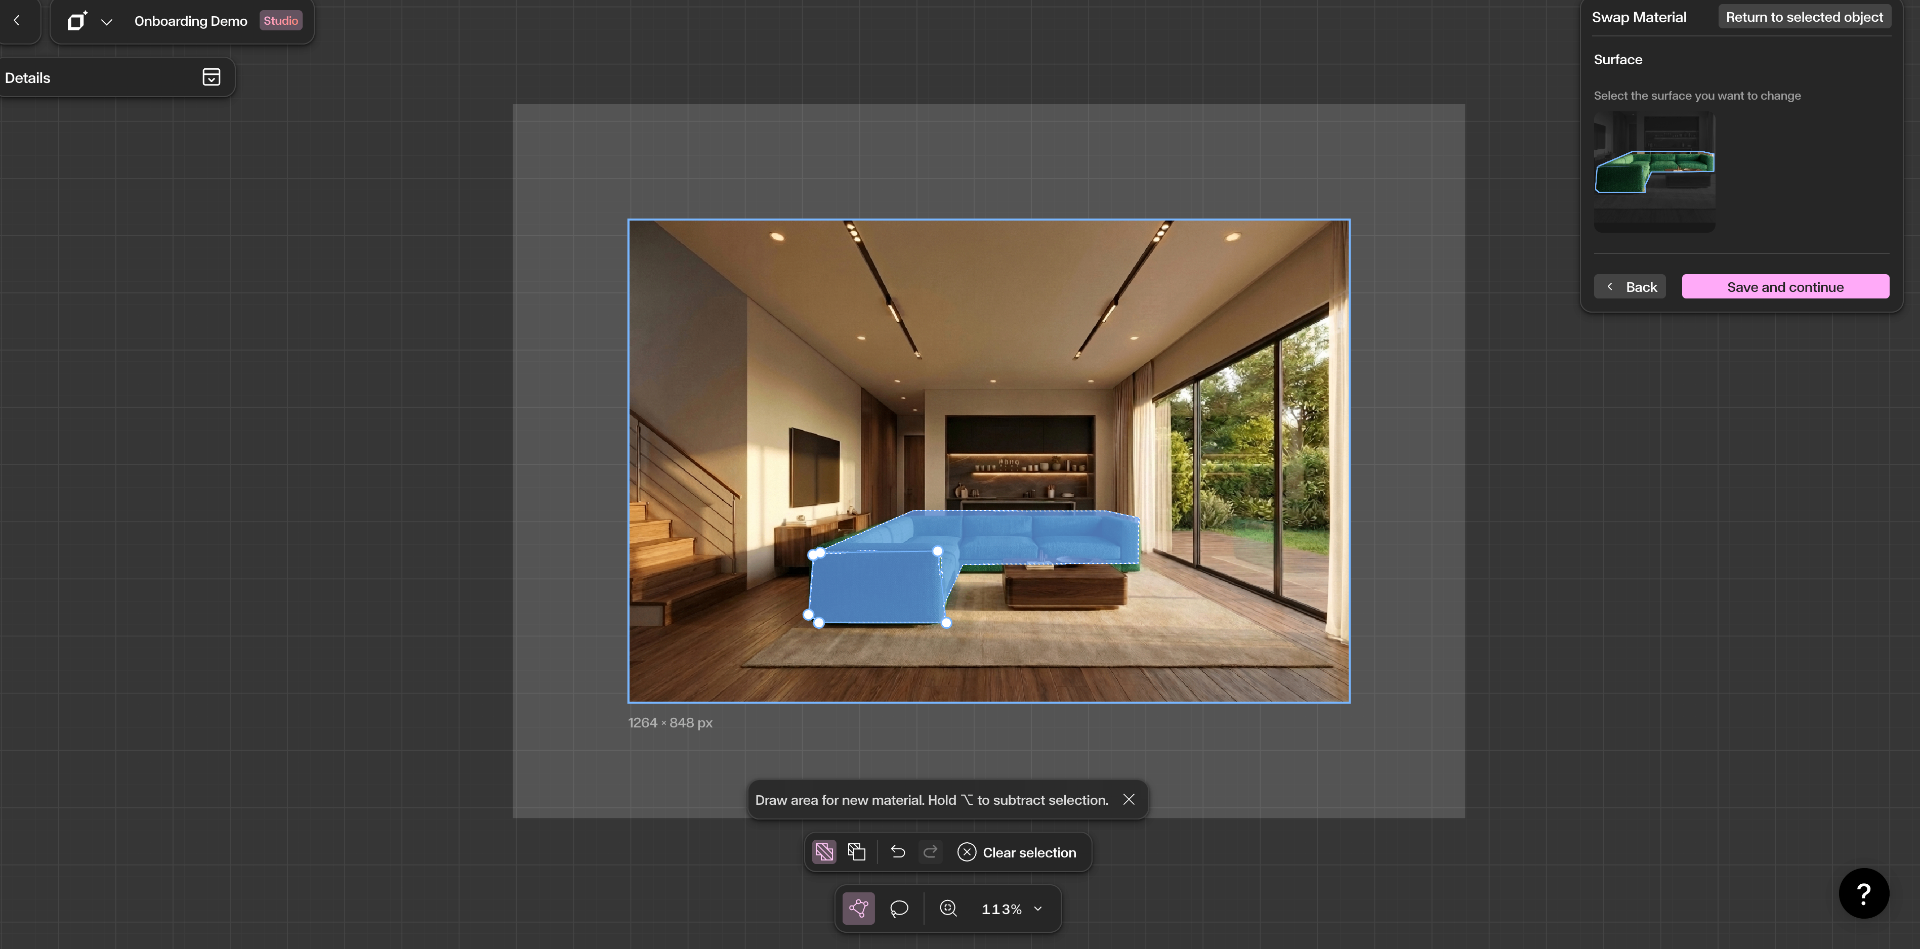
Add a reference material and describe the new finish
Once your surface is saved, the Swap Material panel shows a preview of the selected area. Drop a swatch into Material image reference (optional) to guide texture, tone, colour, and finish — this is highly recommended for accurate results. Then write a Description following the recommended prompt formula: [New Material], [Color & Pattern], [Finish & Effects], [Extra Keywords]. For example: Concrete, warm grey, matte finish, subtle aggregate texture. Use Enhance prompt to refine the wording automatically.
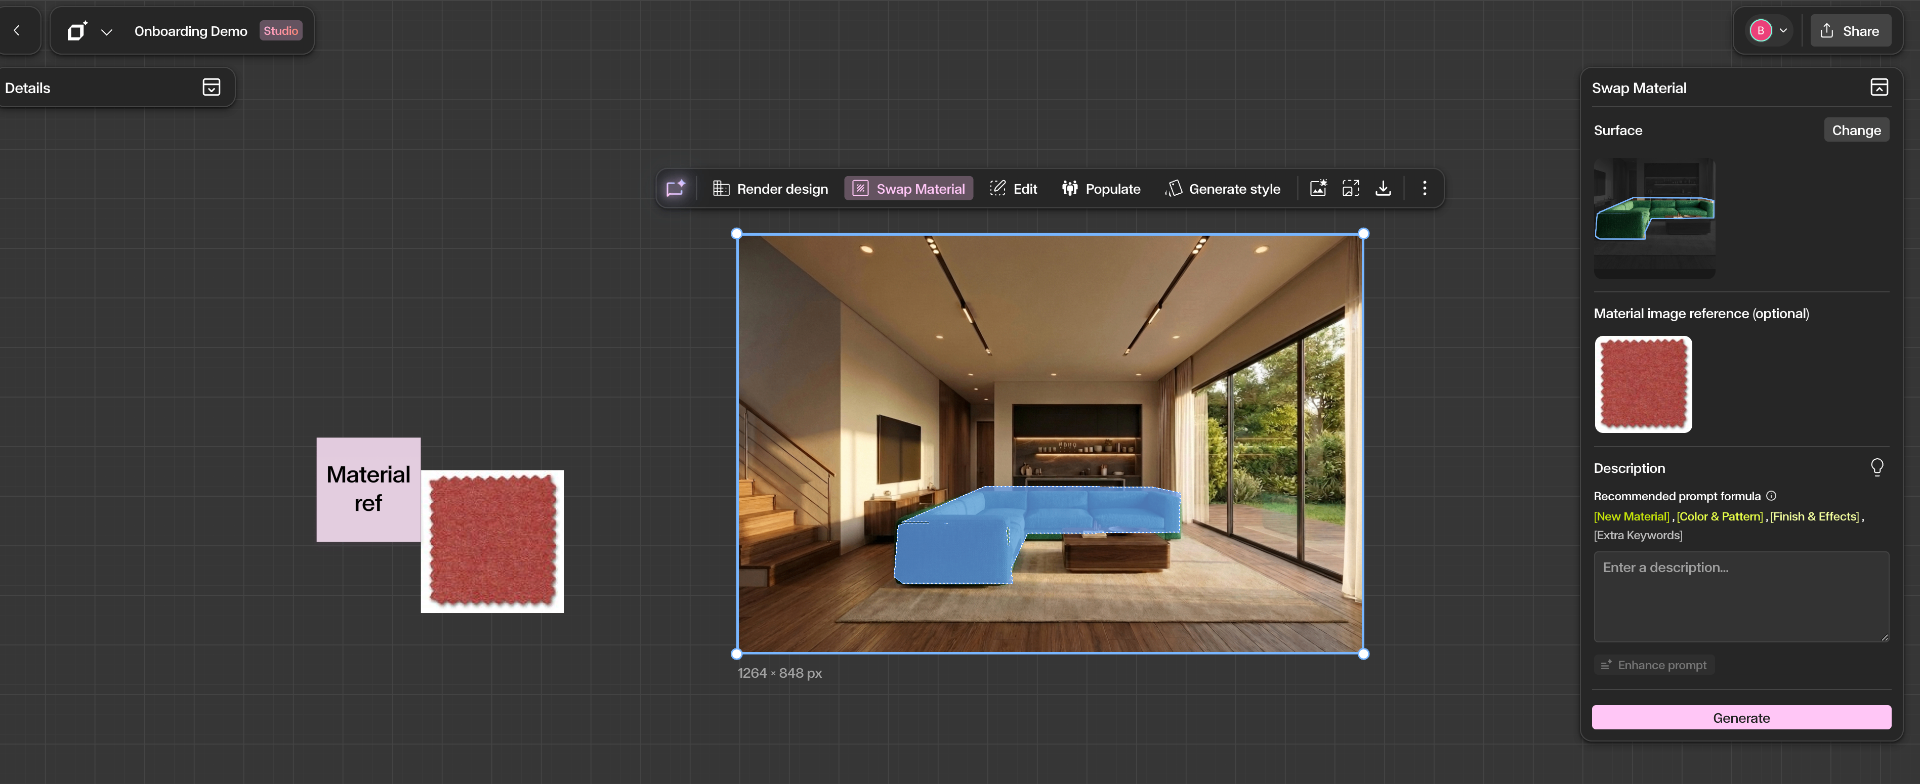
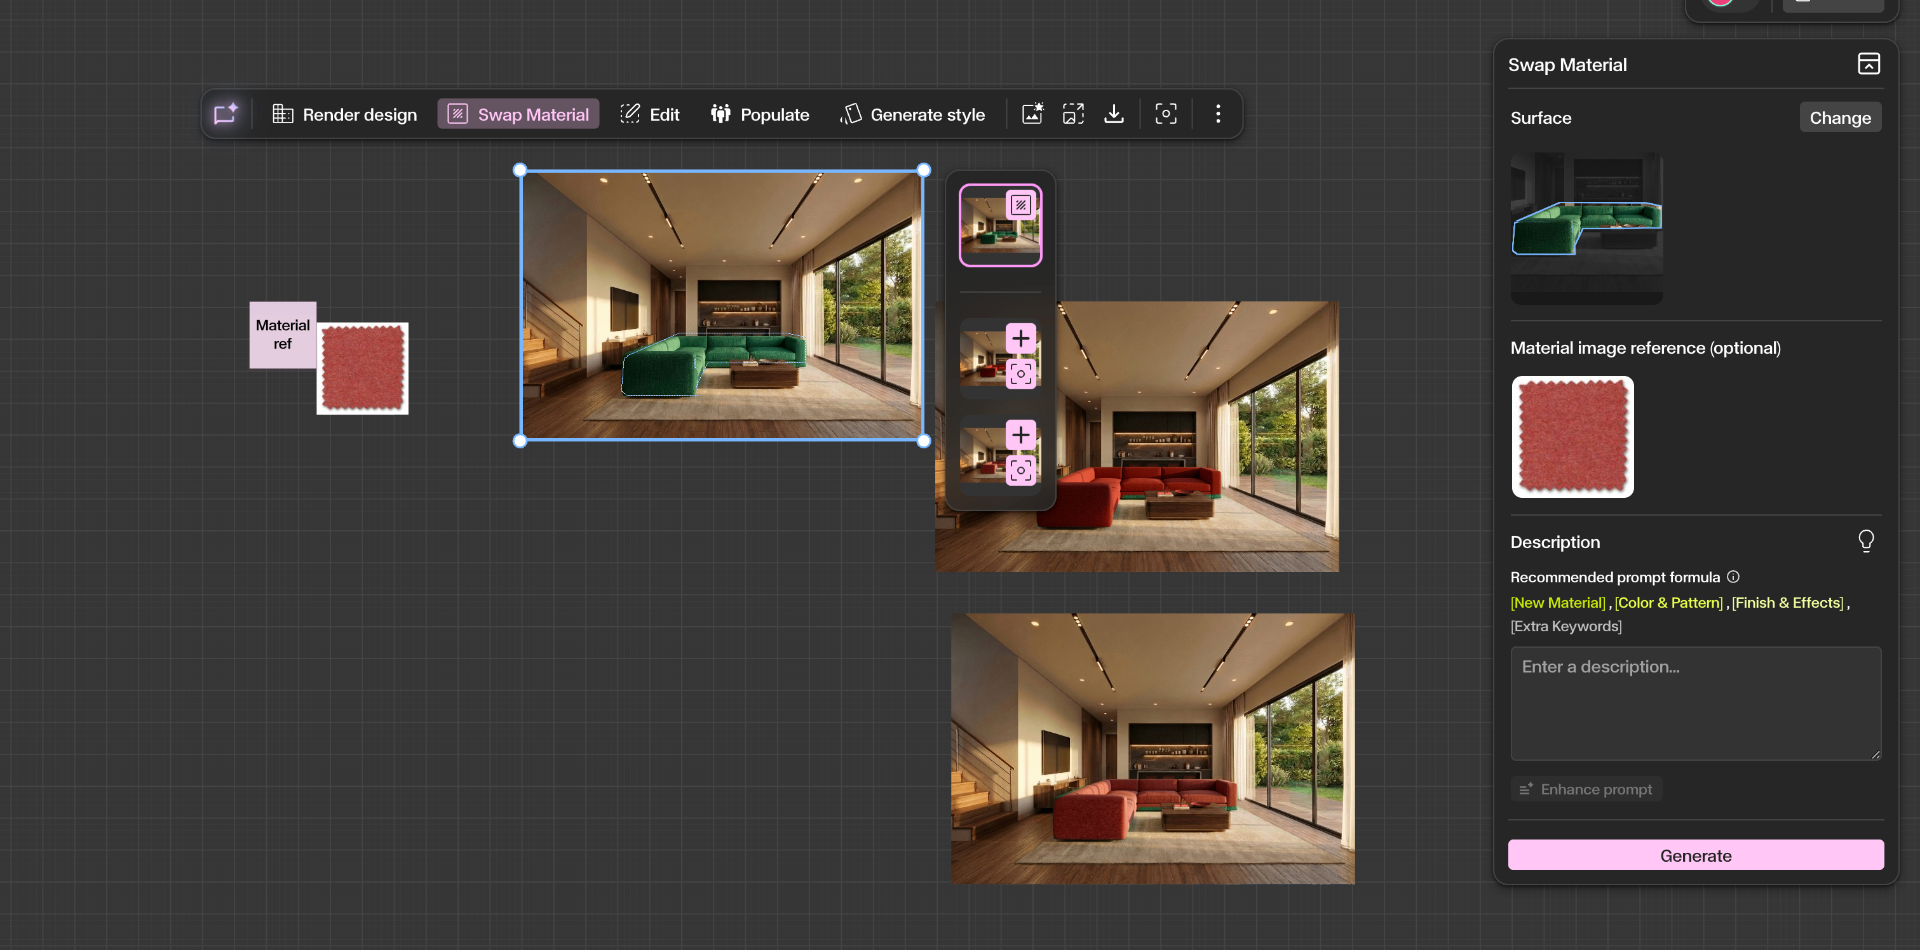
Generate, review, and add to the canvas
Hit Generate — Swap Material produces two variations of the selected surface while everything else in the image stays untouched. Review them in the output panel beside your render and click the + button on any variation to add it to the canvas as its own asset. From there you can compare side by side, iterate with a different reference or prompt, or hit Change in the panel to re-select a new surface and keep exploring.
Adjusting rotation and scale
Sometimes a reference material lands on your surface at the wrong angle or size — the pattern runs in the wrong direction, or the texture is too large or too fine for the scene. The Rotation and Scale sliders let you correct this before you generate.
After you add a reference material, the Swap Material panel shows the material preview with two sliders beneath it:
- Rotation — turns the material to follow the direction and perspective of the surface.
- Scale — sizes the pattern up or down so it reads correctly in the scene, for example matching the veining of a marble slab or the grain of a timber floor.
Each slider shows its current value and has its own Reset link to return it to the default. Adjust until the material sits naturally on the surface, then hit Generate.
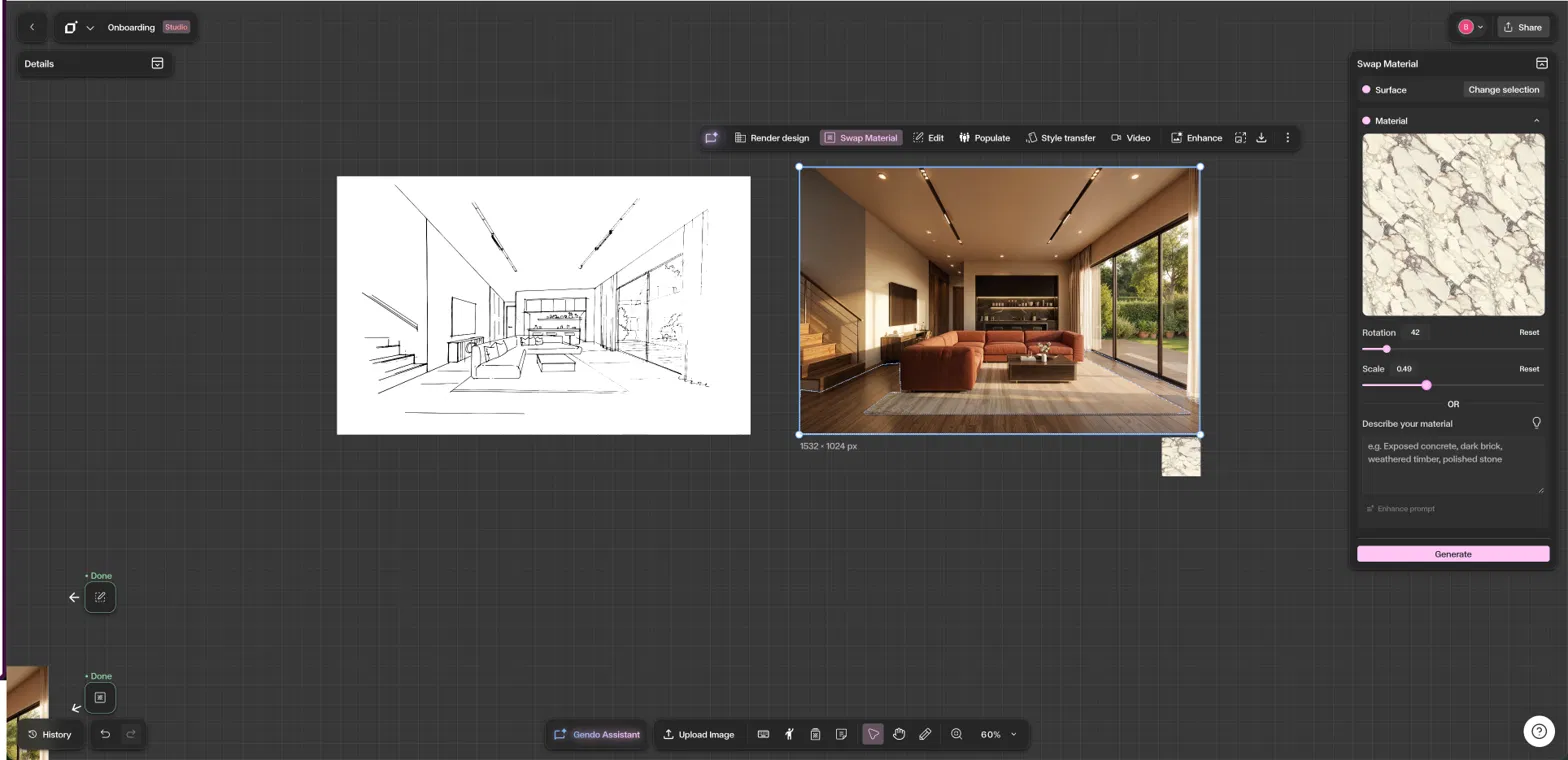
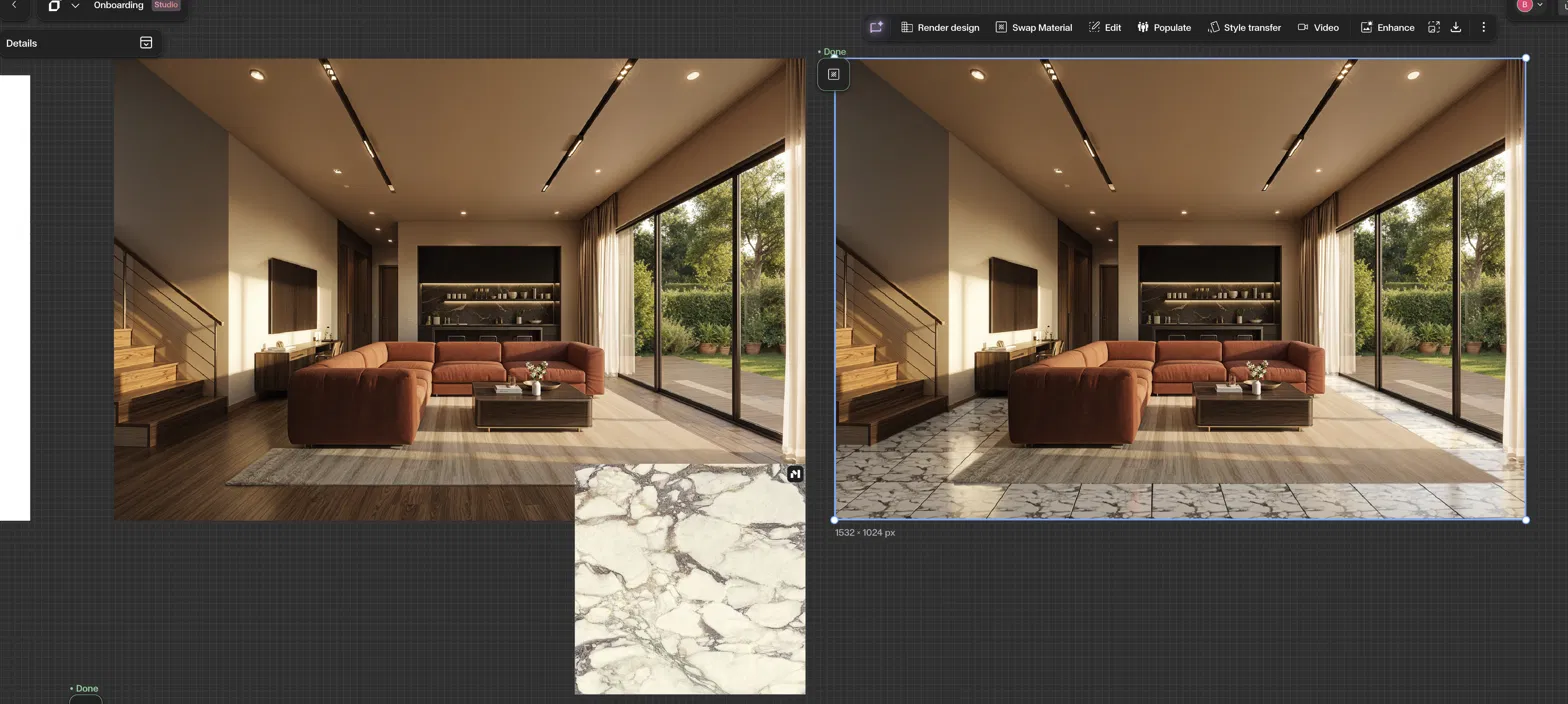
The result maps the new material onto your selected surface following the scene's perspective and lighting, so a swapped floor stays grounded in the render while everything around it is preserved — as in the example below, where a timber floor is replaced with marble at the correct scale and orientation.
Get Better Results
Use the Polygon Tool for architectural elements with clean, straight edges.
Use the Lasso Tool for organic or irregular shapes like landscaping.
Upload a material reference image to guide texture, tone, and finish.
Use the Rotation and Scale sliders to align a reference material to your surface's perspective before generating.
Use Add and Subtract selection modes to refine your mask precisely.
Generate multiple variations to compare different material options side by side.